The first cut matters more than the first coat of paint. Twist a part off its plastic frame and you can leave a gouge that takes longer to fix than the whole assembly step. Use too much cement and a crisp seam can turn into a fingerprint. Neither mistake takes special skill to avoid; it takes a kit you can manage and a habit of checking each fit before you commit.
For a first project, aim to build a sound, clean model before worrying about paint or weathering. You’ll learn how the parts are numbered, how to remove them without damage, and how to join them neatly. Those skills transfer to almost any plastic kit.
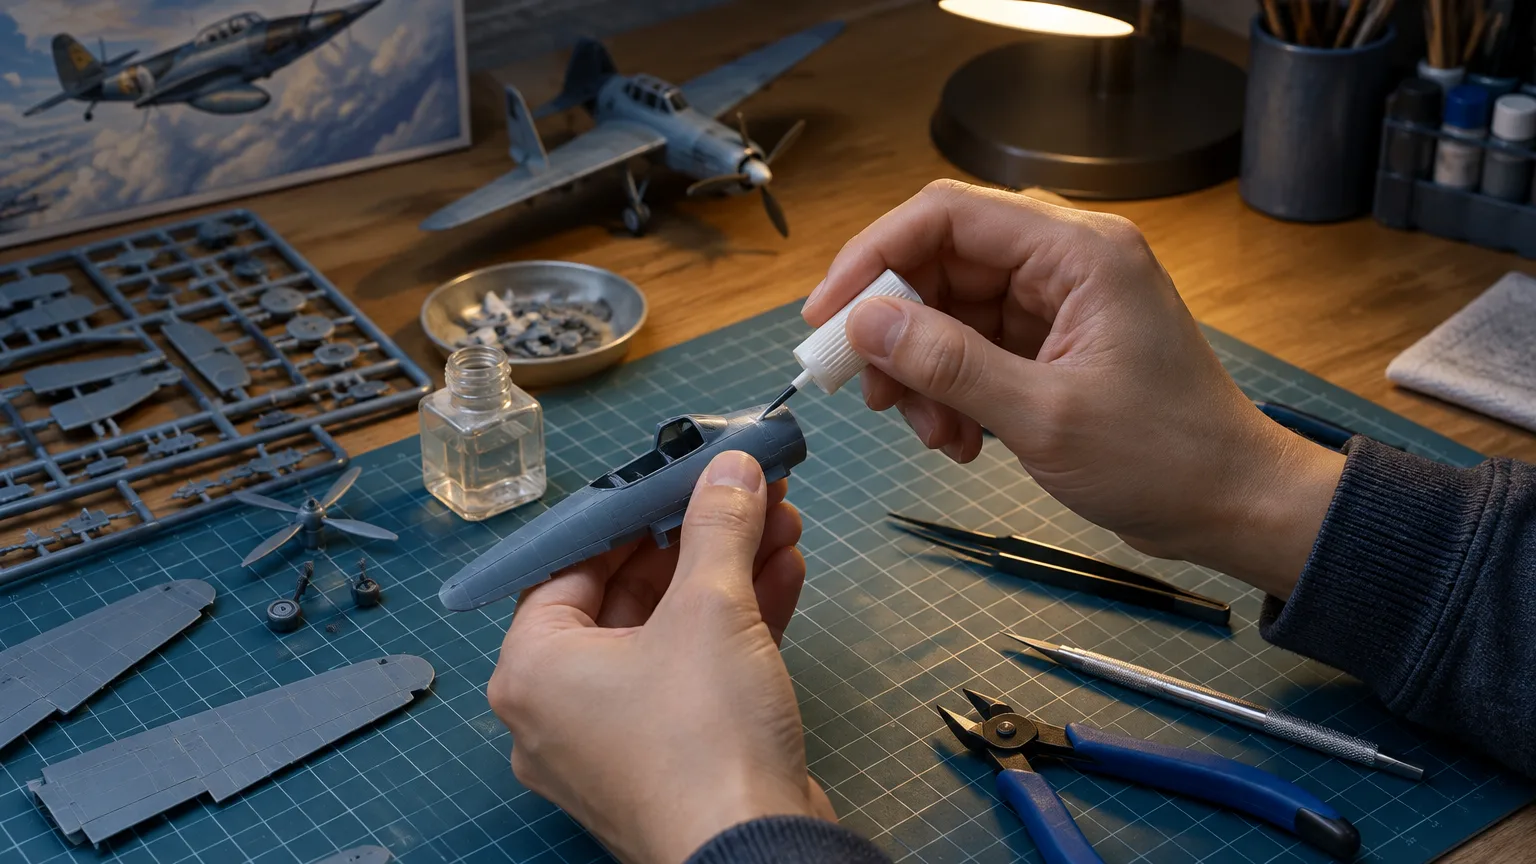
Choose a kit that teaches the skill you want
Start with a subject you’d enjoy seeing on your shelf, then check what the box asks you to do. A kit with fewer parts and large, easy-to-handle pieces gives you more chances to practice clean assembly and fewer opportunities to lose a tiny detail. Avoid making your first project a large ship, a highly detailed engine, or a model with extensive rigging or photo-etched metal.
The most important distinction is between snap-fit and glue-together kits. Revell’s easy-click kits use colored parts that plug together, while its conventional kits call for glue and, to finish them as pictured, paint. Bandai’s Entry Grade assembly guide likewise describes kits that can be assembled without glue; some parts can even be removed without tools.
A snap-fit kit is a good choice if you want to learn the instructions and part preparation first, or if you’re building with a child. If your goal is specifically to learn plastic cement, choose a small conventional kit instead. Check the box or product listing for the required materials. “Plastic model” does not automatically mean that cement, paint, or tools are included.
Look at the instructions before buying if they’re available online or on the box. A sequence of clear drawings and a few manageable subassemblies is more useful to a beginner than an impressive part count. If the model has a clear windshield, cockpit canopy, or chrome-plated pieces, keep reading: those parts need a little extra care when it’s time to glue.
Put together a small, useful tool kit
You don’t need an airbrush, a motorized tool, or a drawer full of specialized adhesives. Set up a well-lit table with a cutting mat or thick cardboard to protect it, and gather:
- A small pair of flush-cut sprue cutters for removing parts from their plastic frames.
- A fine sanding stick or fine-grit sandpaper for smoothing the spots where parts were attached.
- Plastic cement suitable for the kit’s plastic, if the kit requires glue.
- Tweezers for positioning small parts, plus low-tack tape to hold an awkward joint while it sets.
The plastic frame is called a sprue or runner; the short connection between frame and part is a gate. A hobby knife can help clean a stubborn gate, but it isn’t essential for your first build. Sanding is slower and gives you more control. If you do use a knife, work on a mat, keep fingers out of its path, and make shallow cuts rather than trying to remove a gate in one stroke.
Leave the parts on their sprues until the instructions call for them. The frame keeps small pieces from disappearing and makes their molded numbers easier to find. Keep a shallow tray nearby for any pieces that must come off early.
Understand what plastic cement does
Ordinary plastic cement is not a general-purpose glue. On compatible styrene parts, its solvent softens the mating surfaces so they bond as the joint sets. That’s why good contact between parts matters: cement won’t correct a badly fitting joint.
For a first kit, pick one applicator style. A brush-on cement lets you put a small amount on a contact surface before joining the parts. An extra-thin cement is used differently: hold the parts together first, then touch the brush to the seam and let the liquid flow into it. Tamiya describes its extra-thin cement as intended for pre-fitted polystyrene parts with small spaces between them. Neither style benefits from flooding the joint.
Check the kit and adhesive labels before you start. A conventional kit may combine styrene with clear pieces or other materials, and the instructions may mark particular areas “do not cement.” Clear windows and canopies are especially unforgiving: stray solvent cement can mark the visible surface. A water-based adhesive made for clear parts is a useful separate purchase if your kit has them.
Use cement safely
Make room for fresh air before opening the bottle, keep the cap on between applications, and keep the adhesive off your skin and out of your eyes. Don’t use it near flames, sparks, or hot surfaces. Safety information for Tamiya Extra Thin Cement identifies its liquid and vapor as highly flammable and warns that exposure may cause eye irritation, drowsiness, or dizziness. Products differ, so follow the warnings on the one you buy.
Keep cement away from children and pets, and don’t eat or drink at the worktable. If fumes make you feel dizzy or unwell, stop and move to fresh air. For an accidental exposure, Poison Control’s first-aid guidance explains what to do for inhalation, skin, or eye contact; in the United States, you can also call 1-800-222-1222.
Work through the instructions one joint at a time
Read the whole instruction sheet before cutting anything. Find the parts diagram, learn how the sprues are labeled, and note any symbols for optional parts or areas that must remain unglued. You don’t need to memorize the build. You do need to spot, for example, a seat or interior piece that must go between two body halves before those halves are joined.
If the instructions advise washing the parts, do that while they’re still on the sprues: use mild dish soap and lukewarm water, rinse, and let them dry fully. Revell’s kit instructions also call for checking each part’s fit before cementing and removing paint or plating from surfaces that will be glued. Don’t scrub delicate pieces or rush wet parts onto the bench.
For each assembly step, follow the same sequence:
- Identify the part. Match its number and shape to the drawing. Look for a left/right pair or a locating pin that shows its correct direction.
- Cut it free. Support the part with your fingers and cut the gates with sprue cutters. On a delicate piece, leave a tiny bit of gate rather than risking a cut into the part itself.
- Clean the attachment points. Sand the remaining nub until it is level with the surrounding surface. Remove only enough plastic to restore the intended shape. Check for a thin raised mold line as well, particularly where two halves will meet.
- Test the fit without glue. Hold the pieces together and check their alignment from more than one angle. If there’s a gap, find the cause: a leftover gate, a part facing backward, or an interior piece sitting out of place.
- Cement and hold. Apply a little cement to the joining surface, or touch extra-thin cement to a pre-fitted seam. Bring the pieces into alignment and hold them steady. Tape can help with a longer seam, but place it where it won’t touch wet cement.
This rhythm is deliberately slow. Removing every piece at once feels efficient until two nearly identical parts get mixed up. Likewise, cementing a joint before a dry fit saves seconds only if the joint happens to fit perfectly.
Keep seams clean and moving parts free
On two-part bodies—an airplane fuselage, for instance—the best result starts before the cement goes on. Dry-fit the halves with any required interior parts in place. Check that locating pins line up and that the edges meet along the entire seam. Cement a manageable stretch, align it, and move along rather than trying to hold a long, slippery joint all at once.
Use enough cement to bond the surfaces, not enough to coat the outside. If a little softened plastic appears at a seam, leave it alone while it is wet. Wiping it can smear the surface and leave a mark. Let the joint harden before gently sanding a raised seam. Follow your adhesive’s stated cure time before putting real pressure on an assembly; “firm enough to handle” is not the same as fully cured.
Check the instruction symbols before attaching wheels, propellers, turrets, or other parts meant to move. Cement in the wrong place can lock them permanently. And don’t force a peg into a tight hole: stop, check that the correct pieces are paired, and clean any leftover gate material before trying again.
Stop at a good point for painting
Not every part should be glued on before paint. Dry-fit the model and ask which areas will be hard to reach later. A cockpit interior may need attention before the fuselage closes; a small antenna or mirror may be safer left in the box until most handling is done. Keep those parts labeled so you can return to them.
When the main assembly is sound, inspect it under a desk lamp. Look for gate nubs, gaps caused by misaligned parts, and cement marks. Fix what you can without sanding away molded detail. Then put the model down and let the joints cure before washing, masking, or painting it.
A first kit doesn’t have to be flawless to be successful. If its parts are in the right places, the joints are solid, and the visible surfaces are clean, you’ve done the work that gives a paint job its best chance.